Friday, 25 July 2014

Ninja Turtles' Pan Fried Pizza

Michelangelo, Donatello, Leonardo and Raphael!!!! Classic, world-renowned artists or crime-fighting, sewer dwelling, mutant turtles with the vocabulary and appetite of teenagers?!? Like, whoa man! Did you know that the Turtles I grew up with are back with a serious vengeance!!! They are even popular at the Lego(TM) Store (please don't ask how I know that!).

These human sized turtles, with impressive karate skills (not quite as good as Sarah's, my pint-sized niece), may be fictional comic book characters, but their love of pizza is real. And, frankly, so is mine. What better inspiration does one need to make pizza, then the nostalgic comics of these pizza-loving heroes of my childhood? I certainly remember waking up on Saturday to watch these wacky characters fight off the evil ninjutsu master, Shredder, with the help of the stoic, over-sized rat sensai, Splinter.

The turtles had more adventures than I can count, but always, without a doubt, pizza was had. No. Matter. What.

 So now would be good time to make my mother-in-law's recipe for pan-fried pizza. Seriously, could pizza get any better??!! But shall we discuss the history of pizza for a minute before diving in? Well, if you insist....

Well, we all know pizza is an oven-baked, flat, often round, bread typically topped with sauce, cheese and various toppings. The modern pizza that we are all familiar with was invented in Naples, Italy and has become incredibly popular throughout the world.

 A popular urban legend holds that the archetypal pizza, Pizza Margherita, was invented in 1889, when the Royal Palace of Capodimonte commissioned the Neapolitan pizzaolo Raffaelo Espoisto (ahem...sounds like TMNT) to create a pizza in honour of the visiting Queen Margherita. Of the three pizzas he created, the Queen preferred a pie swathed in the colours of the Italian flag: red (tomato), green (basil), and white (mozzarella). Supposedly this type of pizza was then named after the Queen as Pizza Margherita. But sadly, recent research on the topic casts doubt on this legend. Too bad...I kinda liked it.

 According to the rules proposed by the Associazione Vera Pizza Napoletana, the genuine Neapolitan pizza dough consists of wheat flour, natural Neapolitan yeast or brewer's yeast, salt and water. For proper results, strong flour with high protein content (the flour used for bread-making rather than cakes) must be used. There are three official variants of the pizza napoletana: Pizza marinara (made with tomato, garlic, oregano and extra virgin olive oil); Pizza Margherita (as we know from above, made with slice tomato, basil and extra virgin olive oil); and Pizza Margherita Extra (made with tomato, mozzarella from Campania, basil and extra virgin olive oil). The pizza napoletana is a Traditional Speciality Guaranteed product in Europe.

 Lazio style pizza is pizza available in Lazio (Rome), as well as many other parts of the Italy, which is available in two different styles. Take-away shops sell pizza rustica or pizza al taglio. This pizza is cooked in long rectangular baking pans and is relatively thick and usually sold by weight. In pizzerias, pizza is served in a dish in its traditional round shape. It has a thin, crisp base quite different from the thicker and softer Neapolitan style base. In Rome, a pizza napoletana, is topped with tomato mozzarella and anchovies and oil, thus, what in Naples is called pizza romana, in Rome is called pizza napoletana.

 Interestingly, the largest pizza, according to the Guinness Book of World Records, was at Norwood Pick 'n Pay in Johannesburg, South Africa in December 1990. It was 37.4 metres in diameter and was made using 500 kg of flour, 800 kg of cheese and 900 kg of tomato puree. But, the most expensive pizza was made by the restauranteur Domenico Crolla, and included toppings such as sunblush tomato sauce, Scottish smoked salmon, medallions of venison, edible gold, lobster marinated in the finest cognac and champagne-soaked caviar. The pizza was auctioned for charity for 2,150 British Pounds.

 Okay...enough with the history lesson!!!!  Are we ready to have some pizza now??? The recipe is below. Enjoy!    

 Ingredients (this is for one pan pizza):

  • 1/2 cup flour
  • Salt
  • Pepper
  • 4-5 Tbsp olive oil
  • Your favourite pizza toppings

 Directions (for pastry):

Sieve the flour, salt and pepper into a bowl. Make a well in the middle and pour in 2 tablespoons of olive oil, and 4 tablespoons water. Mix into a soft, though not sticky, dough. You may find that you have to add a further tablespoon of water or flour to get the right consistency.

Turn the dough out onto a floured surface and knead lightly. Roll out the pastry in a round shape to fit the base of a 9-10 inch frying pan.


Heat a tablespoon of olive oil in the pan, place the circle of dough in the pan and cook over a low heat for about 5 minutes or until the base is lightly brown.
 
 
Have an oiled plate ready and turn the pizza base out onto it. Heat another tablespoon of oil and slide the pizza base back into the pan and cook the reverse side for 5 minutes.
 
 
During this time, spread the pizza sauce and toppings you enjoy and cook for a few minutes on top of the stove. Transfer the pan to a pre-heated oven on the broil setting and cook for 2-3 minutes to melt the cheese and heat the toppings. 


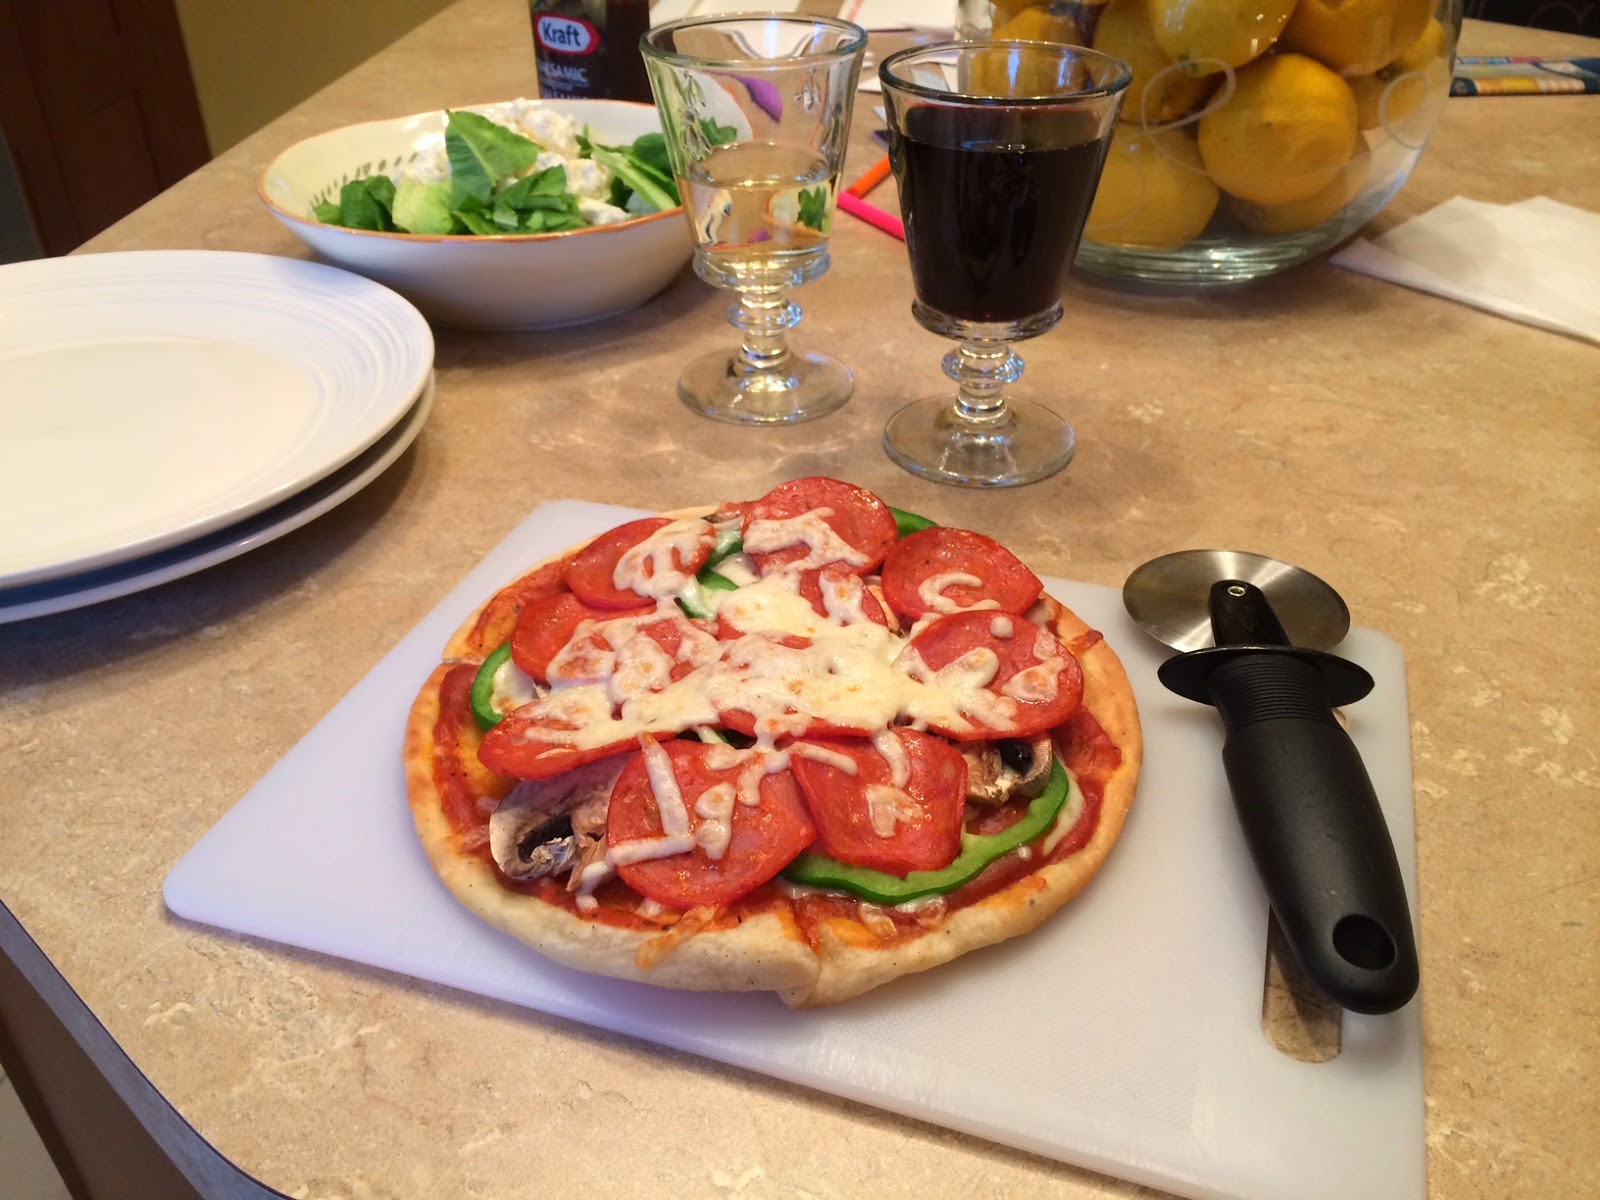
Slide pizza out the pan and enjoy!


Monday, 21 July 2014

Long Time No See

It has been many (about 9!) months since I have last posted a blog. My neglect in this had something to do with purchasing a house, getting engaged, planning our wedding at the new house, losing that new house 2 weeks before closing due to the ice storm of 2013, finding a new house (so much better!), moving in, planning our wedding in the backyard and then marrying the man of my dreams. So, I think a little blogging hiatus was in order. But I am back and so excited to start again. I really missed doing this silly blogging thing.

This week will be some yummy pizza. The blog will be up in a couple days. I hope you all enjoy.
 
Cheers,
 
Mrs. Foodie
 
P.S. Here are a couple photos from the big day. It was amazing!


Sunday, 6 October 2013

Vish Puri's Butter Chicken

The Case of the Deadly Butter Chicken 
By Tarquin Hall 

I came came across this light-hearted murder mystery by chance when I was at the book store a few weeks back. Not only did the title, "The Case of the Deadly Butter Chicken", catch my eye for obvious reasons, but so did the endorsement by Alexander McCall Smith, being "These books are little gems. They are beautifully written, amusing, and intensely readable". Considering how much I love ready McCall Smith's books, this was all the convincing I needed to put this title in my basket. 

This is Tarquin Hall's third installment of the Vish Puri mystery series. I do admit that I have not read the first two books, but frankly, they don't have food in the title!!!! I'll get to them at some point, I'm sure. (I think I must after reading this incredibly fun book...Vish Puri may be my new hero). Vish Puri (a.k.a. Puri, a.k.a. Chubby), India's Most Private Investigator, is a former military man turned private detective, who is in constant battle with his love of food and the number on his bathroom scale. Who isn't?! His adventure begins with a case of a stolen mustache...you read that right...a mustache mystery. This plays close to Puri's heart as he prides himself in having a magnificent mustache of his own. Although this is a very odd mystery, with the victim traumatized that his thirteen foot leviathan has been stolen from quite literally under his nose, the main mystery is when the father of a renowned cricketeer takes a bite of butter chicken at a cricket gala and dies before the guests' eyes. Puri is on the case! His quest to solve the murder takes him into the underworld of cricket betting, to reunite with old friends and as far away as Pakistan, a place he as hated and feared all his life. Since he is India's Most Private Detective, he certainly solves his case, but not without the help of Tubelight, Face Cream, Chanel No. 5 and his beloved Mummy-ji. 

Well as you can imagine, this was the perfect reason for me to try making butter chicken from scratch. You all know that I hadn't made a curry from scratch up until a few weeks ago when I made a vindaloo, so I might as well try to make a butter chicken, also known as Murgh Makhani from scratch too. Butter chicken needs very little introduction. This rich, buttery, creamy dish is likely the most well known of all Indian dishes, served in restaurants and homes alike. It is said to have originated in a restaurant called Moti Mahal in Delhi, India before the partition of British India. 

Butter chicken is not the same as the popular chicken tikka masala...the two dishes look similar and use grilled chicken in the sauce, but the base of each recipe is quite different. Butter chicken is made with pureed tomatoes, spices cooked in butter and finished with fresh cream. The trick is to cook the chicken in a tandoor (a traditional clay oven) where the temperature is much higher than in a regular oven. There have been many attempts to make the perfect butter chicken, but be wary of those recipes using oil as a substitute for butter...it is never as good or satisfying. If you must substitute the cream, then use half and half or evaporated milk so that the dish stays close to the true taste. 

Ingredients: 

  • 2 lbs chicken (washed, patted dry and cut into small pieces - use chicken with or without bones, thighs or a combination of breasts and thighs)
  • 1 teaspoon red chili powder
  • 1 tablespoon lemon juice
  • salt
  • butter/ghee* 


*Ghee is a class of clarified butter that originated in South Asia and is commonly used in South Asian (Indian, Bangladeshi, Nepali, Sri Lanken and Pakistani) cuisine. The word Ghee comes from Sanskrit and has several names around the world. Ghee is made by boiling butter and removing the residue. It is different from clarified butter in that the production of ghee includes simmering the butter along with milk solids so that they caramelize and make it nutty-tasting and aromatic. Spices can be added for flavour. Ghee has a long shelf life and needs no refrigeration if kept in an air-tight container to prevent oxidation. The texture, colour and taste of ghee depends on the quality of the butter and the duration of the boiling. It can be found in the ethnic areas of most major supermarkets. (I used regular butter in the below recipe.)

For marinade: 

  • 3/4 cup plain yogurt, strained, hung or use 1/2 cup Greek yogurt
  • 1.5 teaspoons kasuri methi/dried fenugreek leaves
  • 1/2 - 1 teaspoon turmeric 
  • 1 teaspoon gram masala 
  • 1.5 tablespoons mustard oil (or any other cooking oil substitute)
  • 1.5 tablespoon ginger paste
  • 1/2 tablespoon garlic paste

For sauce/Makani Masala

  • 2.5 inch fresh ginger (made into a paste)
  • 8-10 cloves of garlic (made into a paste)
  • 2-4 fresh green chili pepper (slit)
  • 4 tablespoons melted butter
  • 4 green cardamoms
  • 1.5 to 2.5 inch cinnamon stick
  • 3 cloves
  • 1 black cardamom
  • 1 teaspoon methi/fenugreek seeds
  • 3-3.5 cups tomato puree 
  • 1 tablespoon red chili powder/cayenne/paprika or to taste
  • 10 almonds (soaked, peeled and made into a paste) **I omitted this as there is a nut allergy in my family
  • 1 teaspoon gram masala 
  • 2 teaspoons kasuri methi/dried fenugreek leaves (crushed)
  • 1/2 tablespoon sugar
  • 1/2 cup + 2 tablespoons heavy cream

Preparation: 

Apply red chili powder, lemon juice, and salt to the chicken and set aside for 20 minutes. This is the first marinade.

Combine all the ingredients of the second marinade. Apply this marinade to the chicken and refrigerate for three to four hours, overnight works even better. 

Put the chicken on skewers and cook on a grill or in a preheated oven at 400 degrees for about 10 minutes. Turn midway. Cook until done. Do not overcook, as the chicken will dry out and get fibrous. Baste it with butter/ghee/oil a couple of times while cooking. 

Heat the butter/ghee/oil in a thick bottom pan. Add green cardamom, cloves and cinnamon. Sauté for a couple of minutes or until they start to sizzle and get fragrant; add the methi/fenugreek seeds. When the methi seeds sizzle, add the ginger and garlic pastes and the slit green chilies. Cook for five to eight minutes; the water from the paste would have evaporated and the ginger paste would have reduced in quantity. 

Add tomato puree, red chili powder, and salt. Cook at medium heat for about 15-20 minutes. The puree will reduce to a thick paste and the oil/ghee will separate from the sides of the pan. 

Add 2.5 cups of hot water to the pan, add the almond paste and bring to a boil. Reduce heat and simmer for about 15 minutes; add sugar and crushed methi. 

Add cooked grilled chicken pieces. Stir well to combine - the chicken will be well coated with the sauce. Cover and simmer for eight to ten minutes. Lower the heat and add garam masala and the heavy cream. Stir in the cream and simmer at low heat for about five more minutes. 

Garnish with fresh cilantro and add a splash of cream before serving. 

Serve hot with rice pulao and/or naan.


बॉन एपेतीत
bŏna ēpētīta

Sunday, 15 September 2013

Horatio Hornblower's Big Roast

Horatio Hornblower, my hero... I never would have thought I would have been so enraptured by a man of the high seas, but Mr. Hornblower has won me over. The series of stories by C.S. Forrestor (author of the wonderful African Queen) of the awkward and humble Horatio Hornblower are interesting, exciting and incredibly romantic. How could it not be romantic.....a story about an English man during the Napoleonic war, whose honour and duty are the most important things to him, other than fighting for his King?! 

If you haven't had the opportunity to read any of the stories (or the opportunity to watch the amazing tv movie series...seriously....so good and very true to the books), here is a little information about Mr. "Haitch", as he is sometimes called. As you can imagine, most of the food discussed in this series is awful and is usually spoiled food that a seaman has to endure throughout his time on the high seas. So I'm certainly not going to talk about biscuits with weevils in them...disgusting.  This is about Hornblower's story in Mr. Midshipman Hornblower, where he travelled to the Bay of Oran to resupply his ship, and then encountered the Black Plague (are you looking for the weevils now?). He sails to the coastal town to retrieve the food supplies and heads back to his ship, but since he and the men have been exposed to the Black Plague they are quarantined on the small supply ship, the Caroline, for three weeks.  Now the good news. The supply ship was packed with cattle. A pytain to clean up afterward, but delicious to eat. And the generous Hornblower allows the men to slaughter one cattle for their consumption. His theory...if they are going to die, might as well be happy and have a full belly. 

So here lies my inspiration for this blog. Beef. What the men on the Caroline ate was most likely boiled meat, but I am going to pretend that it was even more of a celebration. And how better to celebrate then with a wonderful roast. Now roast could mean a whole world of different things. The roast I am going to feature is beef brisket...a humble cut of meat (which has now become increasing popular)...but one that my mother has perfected. Its so good that family members have been known to do "brisket au jus shots". It is exactly what you think it is...  

A brisket is the cut of meat from the breast or the lower chest of beef (or veal), beneath the first five ribs and includes the deep pectorals which must be tenderized. Brisket can be cooked in many ways. Basting of the meat is often done during the long cooking process. This normally tough cut of meat (due to the collagen fibers that make up the significant connective tissue in the cut) is tenderized when the collagen is gelatinized (really....that's a silly word) which results in a more tender brisket. The fat cap which is often left attached to the brisket helps to keep the meat from drying during the prolonged cooking that is necessary to tenderize the meat. In stores, you will find that the long piece of meat is cut into two different parts...one that is a flat cut and one that is a point cut. The flat cut is leaner, but the point cut has more flavour due to a bit of extra fat (which is called the deckel). There are many different ways to cook brisket, but all of which are low and sloooow. 

I hope you enjoy my mother's recipe. And seriously...don't forget the aus jus or the horseradish!

Brisket Recipe

Ingredients: 


  • 1 beef brisket point (4 to 5lbs/2 to 3.5 kg)
  • 1 tbsp garlic powder
  • 1 tbsp onion powder
  • 1 tbsp celery seed
  • 1 tsp freshly ground pepper
  • 1 1/2 tsp Knorr Aromat Seasoning
  • 1 bay leaf
  • 1 tsp thyme
  • 1 tbsp dry parsley flakes
  • 1 cup beef broth
  • 1 tbsp Kitchen Bouquet
  • 1 tbsp Worcestershire sauce 

Preparation: 

Wipe beef with damp cloth and pat dry.

Mix together garlic powder, onion powder, celery seed, pepper and Knorr Aromat. Rub meat all over with spice mixture. Place in shallow roasting pan. 

Mix together bay leaf, thyme, parsley, beef broth, Kitchen Bouquet and Worcestershire sauce. Pour over brisket.

Cover pan with foil wrap and perforate in a few places to let steam escape. Place in 325F oven and cook 2 to 2 1/2 hours or until tender, about 30 minutes per pound. About 30 minutes before the brisket is done, remove foil and all brisket to brown. 

Remove brisket from pan and keep warm. Let rest 10 to 15 minutes before slicing. 

Drain off excess fat from pan drippings. Heat and serve with meat.  


באָן אַפּפּעטיט
bʼán ʼaṗṗʻtyt

 !P.S. Mom, Thanks for the photos

Saturday, 7 September 2013

Polly's Curry

Jim "Qwill" Qwilleran is on another adventure in The Cat Who Talked to Ghosts, by Lillian Jackson Braun.  The mustachioed former crime reporter and current millionaire (or is it billionaire) has met a woman friend, Polly, the head librarian at the Pickax library. Qwill enjoys Polly's company since she is interested in literature, is of the same age as him, and even though she is not quite as glamourous as the other women he usually becomes friendly with, there is a beauty about her.  They often spend time together over a good meal and reading to each other. After reading a story about Indian cooking together, Polly is inspired to make curries, a lot of curries. So many in fact, that although Qwill enjoys a good curry, he starts finding excuses to only stop by before and after meals!

Inspired by this silly infatuation with curries, chicken curries, beef curries, vegetable curries, shrimp curries, and every other curry under the sun, I wanted to make my own. I have never made a curry from scratch...I am loathe to admit that any curry that I have made in my kitchen has come from a pre-made bottle. So what better time then now to learn how to make a curry from scratch!!!!

As is my usual custom now, I did a little research on curry, specifically Vindaloo which is a spicy and popular Indian dish from the region of Goa. Mumbai-based Indians also have a variation of this dish. "Vinho de alho" is an old Portuguese pork dish preserved in vinho (red wine) and cooked with alho (garlic). The dish evolved with South Indian West Coast spices and became what we now know as Vindaloo. It is often one of the spiciest dishes on a western restaurant menu.  Western restaurants often serve this dish mixed with potatoes but  traditional Vindaloo dishes do not contain potato.

My boyfriend's wonderful mother makes a fantastic Vindaloo (without potato!!). One so spicy...well...we shouldn't talk about it. But it is super flavourful and wonderfully tasty. The Vindaloo recipe and a Raita recipe (to help put the fire out), is below.

Vindaloo Recipe:

Ingredients:
  • 2 lb. lean shoulder pork or lamb, or one 3 ½ lb. chicken, or 2 lb. raw shrimp (about 22 shrimps to the lb.)
  • 2/3 cup lemon juice, or as needed
  • ½ cup mild-flavoured vegetable oil, or as needed
  • 1 to 2 tsp. salt, to taste
  • 1 tsp. ground black pepper
  • 2 tsp. powered cumin
  • 2 tsp. powered mustard
  • 1 inch-thick slice fresh ginger-root, peeled and cut up
  • 3 cloves garlic
  • 1 large onion, peeled and cut into chunks
  • 2 small dried hot red chili peppers, crushed, or 2 tsp. hot red pepper flakes or to taste
  • 1 tsp. turmeric
  • 1 tsp. powered coriander
  • 1 tsp. powered cinnamon
  • 1 Tb. Sweet paprika
  • 1 to 2 tsp. sugar, or to taste
  • 1 to 2 cups boiling water, as needed
  • Serve with 2 cups cooked rice, preferably basmati and Raita (recipe below)

1.       Trim fat from meat and cut into 1-inch cubes. Or, cut chicken through bones into 12 pieces, first quartering, then disjointing wings and drumsticks, then chopping breasts and thighs in half. Remove skin as you work. Or, shell and devein raw shrimp. Place in glass or ceramic bowl.

2.       Combine 6 Tb. lemon juice, 2 Tb. oil, 1 tsp. black pepper, cumin and mustard. Coat meat, chicken or shrimp with mixture. Marinate meat or chicken for 2 hours at room  emperature; shrimp for 1 hour. If kitchen is warm, marinate in refrigerator but let stand at room temperature 15 minutes before cooking.

3.       Using blender or food processor (preferably with a small bowl), grind together ginger, garlic, and onion until you have a coarse paste. Scrape sides down to incorporate everything. Heat half of remaining oil in a 10- to 12-inch heavy skillet or casserole. Gently sauté ginger-garlic-onion paste for 5 minutes or until it begins to turn yellow. Stir in all remaining seasonings except sugar. Sauté for about 7 to 8 seconds, or until spices lose raw smell. Add more oil if needed. Stir in meat, chicken or shrimp with any liquid remaining in bowl. Sauté over low heat 5 minutes. Stir in 1 cup boiling water, or enough to come just below level of  eat or shrimp.

4.       Cover partially and simmer over low heat until tender, stirring frequently, adding more boiling water if needed to prevent scorching. Meats will take about 1 hour; chicken, about 45 minutes; and shrimp, 15 minutes. Adjust seasonings with lemon juice, salt and pepper, chilies and sugar. Simmer 5 minutes longer, or reheat before serving.

Serve with rice and raita.
Yield: About 6 servings


If you are looking to dress up the curry a little bit more, add some toppings for the table to enjoy. Try diced hard boiled egg, raisins, sliced bananas or shredded coconut for some fun!!!


Raita Recipe: 

Ingredients: 

  • 1 large unpeeled English hothouse cucumber, halved, seeded, coarsely grated 
  • 2 cups plain whole-milk yogurt or Greek yogurt
  • 1/4 cup (packed) chopped fresh mint
  • 1 teaspoon ground cumin
  • 1/4 teaspoon plus pinch of cayenne pepper

Wrap grated cucumber in kitchen towel and squeeze dry. Whisk yogurt, mint, cumin, and 1/4 teaspoon cayenne pepper in medium bowl to blend. Add cucumbers and toss to coat. Season raita to taste with salt and pepper. Cover and refrigerate at least 2 hours. (Can be prepared 1 day ahead. Keep refrigerated.) Sprinkle raita with pinch of cayenne pepper and serve.
Yield: About 8 servings

आप का खाना स्वादिष्ट हो (āp kā khānā svādiṣṭa ho)

Tuesday, 27 August 2013

Gatsby's Cocktail Party


When thinking of the Roaring Twenties, what does one imagine? Flapper dresses, prohibition, jazz, gangsters and magnificently extravagant and glamourous drinking parties that are all the more exciting because they could be broken up by police at any moment. When you have to use secret passwords and hidden doors, that's a party I want to be invited to! For me, it seems so romantic and fun, I wish I could go back in time (and jump into the realm of fiction) and experience just one of Jay Gatsby's amazing parties. But alas, I can't, so instead I will just try to make some Prohibition style drinks at home...sans flapper dress!

As most everyone knows, The Great Gatsby by F. Scott Fitzgerald is a novel that follows a cast of characters living on Long Island in the summer of 1922. The story revolves around Jay Gatsby, a mysterious millionaire who has extravagant parties at his mansion and who has a passion for Daisy Buchanan (who happens to be married to Tom Buchanan, a man having his own affair). I assume that you all know this classic novel so I don't even need to go there. You did read this in high school like I did, right??

The The Great Gatsby is literally drenched in alcohol (perfect for a blog about cocktails!). There are "floating rounds of cocktails" for the guests at all the glitzy parties, and Gatsby himself is alleged to have made his fortune by bootlegging. The sugary drinks featured in the book and during Prohibition were likely meant to disguise the bathtub gin and bootleg bourbon - so glad that we can use "proper" alcohol nowadays. Below are two drinks featured in the novel and two more that are inspired by it.  So lets go make a cocktail!

The Gin Rickey is one of two cocktails that are actually named in The Great Gatsby and is said to have been a favourite of Fitzgerald.  The drink appears on a summer day when Daisy tells her husband Tom to "make us a cold drink" so that she can let Gatsby know of her love for him without her husband around. Tom returns with "four gin rickeys that clicked with ice".  It was a staple during prohibition and consists of gin, lime and soda. Refreshing and delicious! 
a
Put three or four ice cubes in a highball glass, and squeeze in the juice of half a lime. Add around 60 ml of gin and top with soda. Rub the lime wedge around the rim, then drop in the glass.

Mint Julep

This is the second drink that is mentioned in the novel, when Daisy, Tom and Gatsby are having an argument in the hotel. "'l'll make you a mint julep," she tells her husband. "Then you won't sound so stupid to yourself". Wow. I wish I was so ballsy. This is a sugary drink (to cut the bourbon) and is officially a pre-Prohibition drink that likely started in the southern United States and slowly trickled northward. It survived Prohibition and became the official drink of The Kentucky Derby.

Mix a teaspoon of sugar (you can adjust the taste) with a splash of water in a highball glass until dissolved. Add a handful of mint leaves (around 10) and gently bruise with a muddler or wooden spoon. Fill the glass with crushed ice, then pur 60-90 ml of bourbon  depending on the size of your glass. Stir, top up with more crushed ice, and garnish with a few more mint leaves.

Between the Sheets

This cheeky drink is a version of the classic sidecar. It has rum, cognac and triple sec, with a good dose of lemon. This was supposedly a staple for Fitzgerald and friends and will certainly get you in the Roaring Twenties mood!

Mix 30 ml each of brandy, white rum and triple sec with 15 ml of fresh lemon juice in a shaker with ice. Shake, strain into a cocktail glass and garnish with a lemon twist.

Last but not least, the Champagne Cocktail, everyone's (including mine) fizzy favourite. This adds glitz and glam to any party. So pop that cork and let the bubbly flow! The Champagne Cocktail is sophisticated and glamourous and how I envision Daisy and Gatsby.

Place a sugar cub in a chilled champagne glass, add 2 or 3 dashes of bitters, fill the glass with champagne and squeeze a lemon twist on top.


Chin chin!

Monday, 12 August 2013

Popeye's Spanakopita

Popeye the Sailor, again not a literary character (although a comic strip one!) was good inspiration for the following recipe. When thinking of the characters of this iconic comic in terms of food, you have not only spinach loving Popeye, but girlfriend Olive Oyl, and her old beau Ham Gravy and Popeye's ward, Swee' Pea. And who can forget J. Wellington Wimpy the hamburger-loving moocher (a topic for a different blog!)? What a set of characters!! And why not create a recipe with one of those characters in mind?!

As most of us know, strong-arm comic strip character, Popeye the Sailor, has always toted that spinach makes you big and strong...which, as a child, I could even see that parents used this excuse to make me eat spinach, (mom and dad, you never had me fooled!), but as an adult, I love spinach. And I'm not the only one...as it happens, Popeye's popularity actually increased the sale of spinach in the U.S., needless to say, many a farmer became a Popeye fan! 

Although one would likely not consider Popeye Greek, I thought that preparing Spanakopita would be a good homage to this spinach lover. I have always enjoyed Spanakopita, but have never made it before...that phyllo pastry seems so daunting! But, alas, I discovered that it doesn't have to be so scary...its actually fun and simple to prepare. 

As many of you know, Spanakopita is a Greek pastry. It has a filling of chopped spinach and feta cheese, onions (or scallions) and some eggs...that sounds just about perfect to me!!! The filling is wrapped in the shape of a triangle in phyllo pastry. It is mostly eaten as a snack in Greece, but I think that a person could spread it out into a meal if they were so inclined. 

Here is a recipe that I found to be simple and tasty. I hope you enjoy as much as I did!

Ingredients:

1/2 cup vegetable oil
2 large onions, chopped
2 pkg frozen chopped spinach - thawed, drained and squeezed dry (10 ounce)
2 tbsp chopped fresh dill
2 tbsp all - purpose flour
2 pkg feta cheese, crumbled (4 ounce)
4 eggs, lightly beaten
salt and pepper to taste
1 1/2 pkg phyllo dough (16 ounce)
3/4 lb butter, melted

1. Preheat oven to 350 degrees F (175 degrees C).

2. Heat vegetable oil in a large saucepan over medium heat. Slowly cook and stir onions until softened. Mix in spinach, dill and flour. Cook approximately 10 minutes, or until most of the moisture has been absorbed. Remove from heat. Mix in feta cheese, eggs, salt and pepper.

3. Separate one sheet of phyllo from the stack and evenly brush with a light coating of butter. Place another sheet of phyllo over the butter and press the two sheets together. Cut the layered phyllo dough into long strips about 3 inches wide. Keep the remaining phyllo covered with plastic wrap to keep it from drying out.

4. Lay out one strip of phyllo at a time on your work surface with one of the narrow ends close to you. Place a heaping tablespoon of filling 1 inch from the end closest to you. Fold the bottom right corner over the filling to the left edge to form a triangle. Fold the triangle up, bringing the point at the bottom left up to rest along the left edge. Turn the lower left corner over to touch the right edge. Continue turning the triangle over in this manner until you reach the end of the phyllo. Repeat with the remaining filling and phyllo dough.

5. Place filled phyllo dough triangles on a large baking sheet and brush with the remaining butter. Bake in the preheated oven until golden brown, 45 minutes to 1 hour.


Enjoy as an appetizer or add a nice big greek salad and make it a meal!

Καλή όρεξη! (Kalí óreksi!)